

Going from a beginner to an expert in any craft can feel intimidating, especially when it comes to sewing. The initial excitement of choosing a fabric and a pattern can quickly turn into frustration if your final garment doesn’t fit quite right.
This is where the foundational skills of pattern and measurement become essential. Think of them as the blueprint and the ruler for your creative vision. Without them, even the most beautiful fabric and a perfectly executed stitch can’t save a poorly fitting piece.
Mastering these skills isn’t just about getting a garment to fit; it’s about gaining the confidence to modify and create your own designs. This guide will walk you through the core principles, from understanding different body measurements to accurately reading a pattern.
I’ll clarify complex terms and provide practical tips that will transform your sewing experience, turning potential pitfalls into opportunities for learning and growth. You’ll learn how to take precise measurements, choose the right pattern size, and even make minor adjustments to ensure a flattering and professional-looking result.
If you’ve ever wanted to sew beautiful projects without frustration, this is your chance! With Sewing Pattern Secrets, you’ll enjoy easy step-by-step guides, time-saving hacks, and access to patterns that inspire creativity. Whether you want to sew for yourself, your family, or even to sell, the possibilities are endless. Take the first step – Click Here and start Today!
Quick Navigation Menu
Reading and Understanding Sewing Patterns
Taking Accurate Body Measurements
Cutting Fabric According To Pattern Layout
Adding Seam Allowances When Needed
Mastering these skills is the difference between a garment that fits beautifully and one that ends up in the “disappointing projects” pile. Let’s break it down.
Your Guide to Pattern & Measurement Skills
Part 1: Reading and Understanding Sewing Patterns
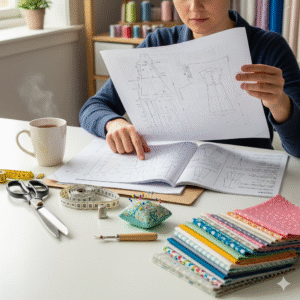 A sewing pattern is an instruction manual for creating a garment. It can be intimidating at first, but it’s just a matter of learning the language.
1] The Pattern Envelope (for Printed Patterns)
This is your first stop. It contains vital information.
Front of the Envelope:
Style Illustration/Photo: Shows the finished garment, often in multiple views (e.g., View A with sleeves, View B without).
Pattern Number & Size: Always check the specific sizing chart on the back, as pattern sizing is different from ready-to-wear.
Back of the Envelope:
Body Measurements & Size Chart: This is the most important part! Your pattern size is determined by your body measurements, not your ready-to-wear clothing size. Compare your bust, waist, and hip measurements to this chart to select your size.
Fabric Recommendations: Suggests suitable fabrics (e.g., “lightweight linen,” “stable knit,” “non-stretch woven”). Do not ignore this. Using the wrong fabric will ruin the garment’s drape and fit.
Notions List: Details all the extra items you’ll need: zipper length, button size and quantity, interfacing, elastic, etc.
Finished Garment Measurements: Often shown as “Finished Length” or “Finished Bust.” This tells you how loose the garment will be. Compare the “Finished Bust” to your actual bust measurement to understand the ease (amount of wiggle room).
2] The Pattern Instructions
This is a multi-page sheet of written instructions and diagrams.
General Instructions: The first page usually has a key to all the symbols used on the pattern pieces (e.g., arrows, circles, notches).
Cutting Layouts: Diagrams showing how to arrange your pattern pieces on the fabric for different views, sizes, and fabric widths. Follow the layout for your size and view to avoid wasting fabric.
Step-by-Step Guide: Numbered instructions with illustrations guiding you through the construction process. Read each step completely before you start sewing.
How to Effortlessly Make Over 150 Sewing Projects…Even If You’re A Complete Beginner! Watch Video Here
3] The Pattern Pieces
These are the templates you trace or cut out.
Identify Each Piece: Find the piece name or number (e.g., “Bodice Front 1,” “Sleeve 2”).
Crucial Information on Each Piece:
Size: Ensure you are cutting the correct size line.
Grainline: A long arrow that must be placed parallel to the selvage (the finished edge of the fabric). This ensures the garment hangs correctly.
Fold Line: Means you place this edge directly on the fold of your fabric to create a symmetrical piece.
Notches: Diamond or triangle-shaped symbols on the edges. These are matching points. A single notch on the front armhole matches to a single notch on the front sleeve. A double notch on the back matches to a double notch on the back sleeve. Clip outwards into the seam allowance, don’t cut them off.
Dots, Squares, and Circles: These indicate points for matching, gathering, or placing details like pockets.
Darts & Pleat Lines: Shown as dashed or dotted lines, often with a point.
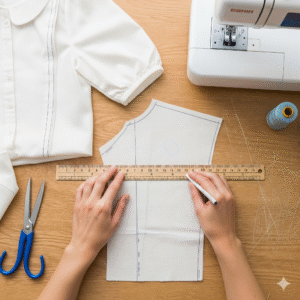
 Part 2: Taking Accurate Body Measurements
![]()
![]()
 Accuracy is everything. You can’t pick the right size without the right numbers.
What You Need:
– A flexible measuring tape.
– Well-fitting undergarments (or the ones you’ll wear with the garment).
– A helper for hard-to-reach places like the back neck.
– A string or ribbon to tie around your natural waist.
How to Measure:
Stand naturally, without sucking in your stomach. Keep the tape snug but not tight; it should not dig into your skin.
Bust/Chest: Measure around the fullest part of your bust/chest, ensuring the tape is level across your back.
Waist: Find your natural waist by bending to the side; where your body creases is your waist. Tie a string there to mark it. Measure around this point.
Hips: Measure around the fullest part of your hips and bottom, usually 7-9 inches below your waist.
High Bust (Crucial for Fitting!): Measure around your torso, just under your arms and above the fullest part of your bust. This helps determine your frame size and is especially important for fitting bodices and dresses.
Back Waist Length: Measure from the prominent bone at the base of your neck to your natural waist string.
Other Common Measurements:
Shoulder: From the base of your neck to the edge of your shoulder bone.
Armhole Depth: From the top of your shoulder down to your armpit.
Inseam: From the crotch to your desired ankle length (best measured on a well-fitting pair of pants).
Download the Best Pattern Guide & Discover 150+ Beginner-Friendly Sewing Projects! Click Here
Rise: Sit on a flat chair. Measure from your waist down to the chair seat.
Pro Tip: Write these measurements down on a card and keep them with your sewing supplies.
Part 3: Cutting Fabric According to Pattern Layout
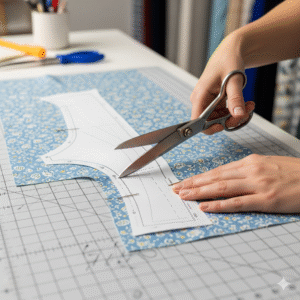 A careful cut is a successful sew.
Prep Your Fabric: Always pre-wash, dry, and press your fabric as you will launder the finished garment. This pre-shrinks the fabric and removes finishes.
Find The Grain: Identify the selvage (tight, woven edges) and the cross-grain (runs perpendicular to the selvage). The grainline on your pattern pieces must be parallel to the selvage.
Fold Fabric Correctly: Most layouts call for fabric folded lengthwise (“with the fold”) or opened out completely (“without the fold”). Follow the diagram exactly.
Arrange Pattern Pieces:
Lay out all pieces on the fabric before you pin, following the suggested layout for your view and size. Place pieces with a “place on fold” line right on the fabric fold.
Check Grainlines: For each piece, measure the distance from the grainline arrow to the selvage at both ends. Adjust the piece until the distances are equal, then pin the ends of the arrow to secure it. This ensures it is perfectly straight.
Pin and Cut:
– Pin generously inside the cutting line, placing pins perpendicular to the edge.
Use sharp fabric shears. Cut with long, smooth strokes. Don’t lift the fabric off the table while cutting.
Transfer Markings: Before removing the pattern paper, transfer all important marks to your fabric using:
Tailor’s Chalk or Fabric Marker: For lines (darts, pleats).
Overwhelmed by Sewing Projects? These Patterns Make It Easy – Start Now!
Tracing Wheel & Carbon Paper: For precise dots and notches.
Thread Tracing (Basting): A very accurate, traditional method for marking important points.
Part 4: Adding Seam Allowances When Needed
 A seam allowance (SA) is the extra fabric between the cutting line and the stitching line.
When is it Already Included?
Commercial Patterns (Big 4 – Simplicity, McCall’s, etc.): Almost always include a 5/8″ (15mm) seam allowance. You do not need to add more.
Commercial Patterns (Indie/European): Often include a 3/8″ or 1/2″ (10mm or 12mm) SA. Always check the pattern instructions first! It will be stated clearly.
When Do You Need to Add It?
– Drafting your own patterns from a block or sloper.
– Using a “pattern” that is just a outline (e.g., from a book or online tutorial).
– Tracing off a garment (and you are not including the SA in your tracing method).
How to Add It Accurately:
Choose Your Width: Common SA widths are 1/4″ (6mm) for delicate fabrics, 3/8″ (10mm), 1/2″ (12mm), or 5/8″ (15mm) for standard sewing. The pattern should specify.
Use a Tool:
Seam Gauge: A small, movable ruler. Perfect for measuring and marking consistent allowances on curves and corners.
An Add-A-Seam-Ruler: A clear ruler with multiple parallel lines offset by common seam allowance widths. Place it next to your pattern line and trace the offset line.
Marking Wheel: Some wheels can be set to roll a specific distance from an edge.
The Process:
– Place your pattern piece on paper.
– Using your chosen tool, draw a new line parallel to the original cutting line, offset by your desired seam allowance width.
– Go slowly around curves, making small marks and then connecting them smoothly.
Important: You do not add seam allowance to edges that are meant to be placed on the fold.
Ready to take your sewing skills to the next level? With Sewing Pattern Secrets, you’ll gain access to hundreds of easy-to-follow patterns, insider tips, and expert tricks that make sewing simple and fun. Imagine creating stunning clothes, gifts, and home décor with confidence! Don’t miss out – Click Here to grab your copy now and start sewing like a pro!
By mastering these four areas, you will build a solid foundation for all your sewing projects, leading to professional-looking and great-fitting garments. Happy sewing
Related Reading
How to Read a Sewing Pattern: Symbols, Terms, and Tips
Top 10 Things Sewing Patterns Don’t Tell You
5 Easiest Sewing Patterns for Absolute Beginners
How to Build Confidence When Using Sewing Patterns