
When you first sit down at a sewing machine, the world of fabric, patterns, and stitches feels both exciting and overwhelming. Beginners are usually told the basics—thread your machine, practice straight lines, and don’t forget to backstitch—but there are so many little tips that experienced sewists pick up along the way that rarely make it into tutorials.
These quiet “secrets” can make the difference between frustration and joy, between a project that gets abandoned and one that comes together beautifully.
That’s why today, I’m uncovering eight of those small but game-changing sewing secrets that no one really tells beginners. Whether you’ve just bought your first machine or you’ve been dabbling with fabric for a while, these insights will help you avoid common pitfalls, save time, and boost your confidence. Think of them as insider shortcuts that make sewing feel less intimidating—and a lot more fun.
Of course! Stepping into the world of sewing is exciting, but there’s a whole hidden curriculum of tips and tricks that experienced sewists often forget to mention because they’ve become second nature.
Quick Navigation Menu
8 Sewing Secrets That No One Tells Beginners
17 Sewing Machine Tips That No One Tells Beginners
10 Essential Rules for Becoming a More Confident Sewist
8 Sewing Secrets That No One Tells Beginners
 1] The Pressing Iron is Your Most Important Tool (Not Your Sewing Machine)
Beginners often focus 99% on the machine and 1% on the iron. In reality, pressing is what separates a homemade-looking project from a professional one.
The Secret: You don’t just iron out wrinkles. You “press” seams open to set the stitches and reduce bulk. You use steam to shape fabric (like easing in a sleeve cap). You press darts in a specific direction to make them lie flat. A good press at every single step is the magic wand of sewing.
2] Your Machine’s Manual is a Goldmine
It’s the most boring book on the shelf, but it holds all the answers. People run to online forums first, but 90% of basic machine issues are solved in the manual.
The Secret: The manual tells you exactly how to thread your specific machine (the number one cause of most problems), what tension settings to use for different fabrics, how to clean and oil it, and what each presser foot is actually for. Keep it next to your machine!
Unlock your creativity and start sewing like a pro with Sewing Pattern Secrets – the ultimate collection of step-by-step patterns and expert tutorials that make sewing fun, easy, and stress-free! Whether you’re a beginner or an experienced sewer, you’ll discover time-saving techniques and gorgeous designs that bring your projects to life. Don’t wait to turn your passion into stunning creations – Click here to get instant access to Sewing Pattern Secrets today!
3] You Don’t Need to Backstitch to Secure Every Seam
Beginners are taught to backstitch at the beginning and end of a seam to lock it. This is great, but it adds bulk.
The Secret: On delicate fabrics or enclosed seams (like in a collar or French seam), reducing the stitch length to a very tiny setting (1.0mm – 1.5mm) for the first few stitches achieves the same secure hold without the ugly bump of a backstitch. You can also leave long “thread tails” and hand-knot them for an invisible finish.
4] Fabric Choice is 90% of Your Success (or Failure)
It’s tempting to buy the prettiest, cheapest fabric for your first project. But sewing a structured bag with floppy rayon or a flowy dress with stiff upholstery fabric is a recipe for frustration.
The Secret: Follow the pattern’s fabric suggestions. They are there for a reason. Start with stable, easy-to-sew woven fabrics like cotton poplin, quilting cotton, or denim/chambray. Avoid slippery, stretchy, or sheer fabrics (satin, chiffon, jersey) until you’ve mastered the basics.
5] “Pressing” and “Ironing” Are Two Different Things
This seems pedantic, but it’s crucial.
The Secret: Ironing is what you do to remove wrinkles—you slide the iron back and forth over the fabric. Pressing is what you do in sewing—you lift the iron up and down, placing it on a specific area (like a seam) with pressure, and then lift it straight up. Sliding the iron can distort the grain of your carefully cut fabric.
6] You Will Use Your Seam Ripper More Than Your Scissors
Everyone makes mistakes. Everyone. The most experienced sewists have a seam ripper permanently in hand.
The Secret: Don’t see “unsewing” as a failure. See it as a standard part of the process. The real skill isn’t in never making a mistake; it’s in knowing how to efficiently and carefully fix it without damaging your fabric. Embrace the seam ripper as your best friend, not your enemy.
7] The Magic of Clipping and Notching
You sew a curved seam and it looks perfect… until you turn it right-side out and it’s a lumpy, puckered mess. The solution is hidden inside the seam allowance.
The Secret: For concave curves (like the neckline or armhole), you need to make small clips into the seam allowance almost up to the stitching line. This allows the fabric to spread and lie flat. For convex curves (like a collar), you need to cut small notches (little V shapes) out of the seam allowance to reduce bulk so it can turn smoothly.
Ready to take your sewing skills to the next level? With Sewing Pattern Secrets, you’ll gain access to hundreds of easy-to-follow patterns, insider tips, and expert tricks that make sewing simple and fun. Imagine creating stunning clothes, gifts, and home décor with confidence! Don’t miss out – Click here to grab your copy now and start sewing like a pro!
8] It’s Not About Having All the Gadgets
The sewing world is full of specialized tools, and it’s easy to feel like you need to buy everything. You don’t.
The Secret: You can start with a very basic kit:
– Bent-handle dressmaker’s shears (for fabric)
– Small scissors (for snipping threads)
– Seam ripper
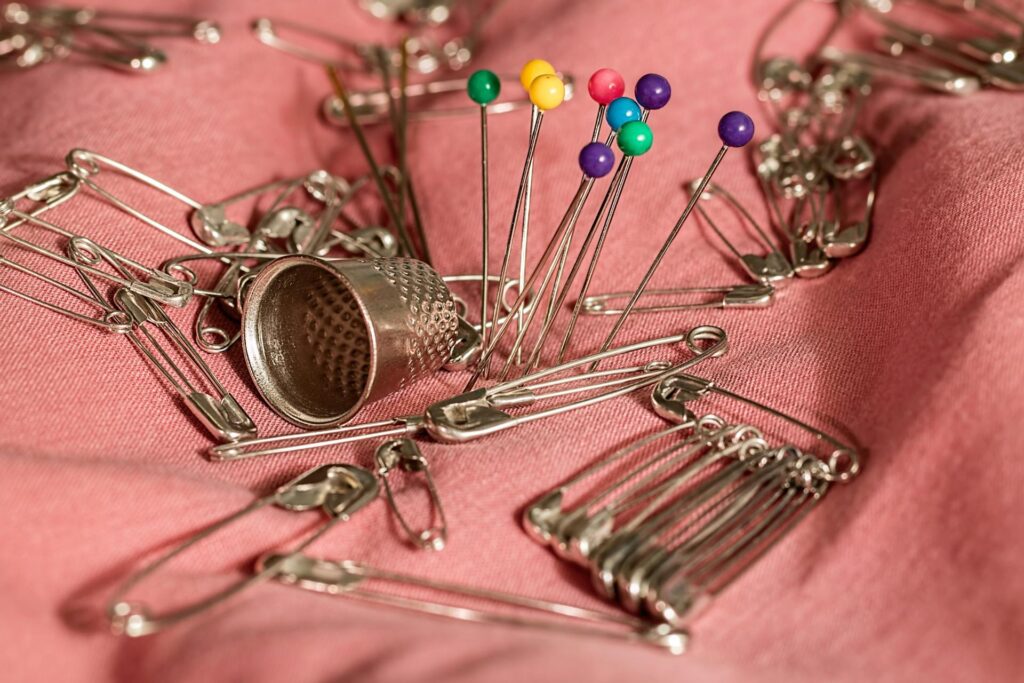
– Glass-head pins (they won’t melt if you iron over them)
– Fabric marker (chalk, water-soluble pen, or fading marker)
– Tape measure
– An iron and ironing board
You can use a safety pin as a bodkin, a credit card as a seam gauge, and kitchen shears as pinking shears in a pinch. Build your tool collection slowly as you discover what you actually need.
17 Sewing Machine Tips That No One Tells Beginners
 1] Before You Even Thread the Machine… The “New Machine” Reality Check: Your machine straight out of the box is not ready to sew. It’s coated in a thin layer of lubricant and oil for shipping. Wipe down the needle plate, bobbin case, and race (the metal ring the bobbin sits in) with a soft, dry cloth to remove any excess oil that could stain your first project.
2] Read the Manual… But Not Like a Book. Sit with your machine and the manual. Turn each knob, push each lever, and find the button it’s describing. This “hands-on” tour is the fastest way to learn what everything does. Bookmark the sections on threading, inserting the bobbin, and tension adjustments.
3] The Secret Life of Bobbins… Bobbins need to “breathe.” Don’t overfill them. Most bobbins have a line or a hole indicating the maximum fill. An overfilled bobbin can cause tension issues and jams. When you start winding, hold the thread tail for the first few stitches to ensure it winds evenly.
4] Befriend Your Feed Dogs… These are the little toothy guys under the presser foot that move your fabric. Their height is crucial. For regular sewing, they must be “up” and visible. You only drop them (using a lever or button) for darning or free-motion quilting. Most beginners’ puckering problems are because the feed dogs are accidentally dropped.
5] The Art of the Stitch (What the Manual Leaves Out)… The Magic of the Handwheel: Before you step on the pedal for any new seam, especially when starting at the very edge of fabric, turn the handwheel (toward you) to manually lower the needle into the fabric first. This ensures the needle is in the right position and prevents the fabric from getting sucked down into the throat plate.
Discover the joy of sewing without the stress or confusion! Sewing Pattern Secrets gives you clear instructions, beautiful designs, and everything you need to bring your ideas to life. Whether it’s fashion, crafts, or décor, you’ll have a world of projects at your fingertips. Start today and see how easy sewing can be – Click here to get started instantly!
6] Your Presser Foot is a Grip Tool… The presser foot’s job is to hold the fabric firmly against the feed dogs. You should never pull or push the fabric through the machine. Your only job is to guide it gently from the front and back. Let the machine do the work. Pulling stretches the fabric and can break needles.
7] The “Needle Down” Button is Your Best Friend… If your machine has this function (a button that makes the needle stop in the down position), use it always. When you stop to adjust fabric or pivot a corner, the needle down function acts like an anchor, keeping your fabric exactly where you left it.
8] Pivot, Don’t Swivel… When turning a corner, stop with the needle down in the fabric. Lift the presser foot. Pivot the fabric around the needle. Then lower the presser foot and continue sewing. This gives you perfectly sharp corners.
9] The True Purpose of Those Seam Guides… The lines on your needle plate aren’t just suggestions. They are critical for sewing consistent seam allowances. Don’t watch the needle; it’s hypnotic and will make you veer off course. Pick a guide line and focus on keeping the edge of your fabric aligned with it for the entire seam.
10] Taming Tension and Thread (The Dark Arts)… 90% of Problems are Top Threading: If you get loops, birds’ nests, or skipped stitches, don’t touch the tension dial first! Instead, completely unthread the machine. Check that the presser foot is UP (this opens the tension discs so the thread can seat properly) and re-thread everything meticulously. This fixes most issues.
11] The Bobbin is the Innocent Bystander… It’s almost never the bobbin’s fault. Issues blamed on the bobbin are usually caused by the top thread not being seated correctly in the tension discs or the bobbin being inserted the wrong way. (Check your manual for the correct direction—it matters!).
12] Change Your Needle WAY More Often Than You Think… A dull or slightly bent needle is the cause of countless problems: skipped stitches, snagged fabric, and uneven stitches. A good rule of thumb: change your needle after every 8 hours of sewing or at the start of every new project. It’s the cheapest and easiest maintenance you can do.
13] The Right Needle for the Right Job… This isn’t a marketing gimmick. Universal needles are “okay” for wovens, but using a Sharp/Microtex needle for silks and linens, a Ballpoint/Jersey needle for knits, and a Denim needle for thick layers is a game-changer for stitch quality.
Stop struggling with complicated sewing patterns and start creating with ease! Sewing Pattern Secrets is packed with beginner-friendly tutorials and professional patterns designed to make sewing fun and rewarding. Perfect for all skill levels, you’ll be amazed at what you can create. Don’t wait another day – Click here to unlock your sewing success today!
14] Embrace the Seam Ripper… Every single sewist, from absolute beginner to master tailor, uses a seam ripper. It’s not a sign of failure; it’s your most important editing tool. Unpicking a bad seam is faster and more professional than trying to sew over it.
15] Press as You Go, Not at the End… This is the single biggest difference between a project that looks “homemade” and one that looks “handcrafted.” Press every seam flat after you sew it (this sets the stitches) and then press it open or to the side. Your finished project will look impeccable.
16] Cleanliness is Next to Godliness… Fuzz and lint are the enemy of your machine. After every project (or every 8 hours of sewing), take off the needle plate and use the little brush that came with your machine to clean out the bobbin area and feed dogs. This prevents a huge number of jams and timing issues.
17] Walk Away… If you’re getting frustrated, making mistakes, and everything is going wrong… stop. Walk away for 10 minutes, have a cup of tea, and come back. You’ll solve the problem with fresh eyes and save yourself from a major mishap.
Final Unspoken Truth… The sewing community is incredibly supportive. If you’re stuck, take a picture or a short video and ask for help online. Everyone remembers being a beginner and is usually thrilled to help you unlock the joy of sewing. Happy stitching
10 Essential Rules for Becoming a More Confident Sewist
 1] Press Your Seams Like a Pro
The Rule: Treat your iron as your most important sewing tool, not an afterthought.
Why it Builds Confidence: A well-pressed seam looks professional immediately, which is incredibly motivating. Pressing at each step (first flat to “set” the stitches, then open or to the side) makes the next steps easier and more accurate. Your finished projects will look store-bought, banishing the “homemade” look that can dent a beginner’s confidence.
2] Master the “Needle Down” Habit
The Rule: Always stop with your needle in the down position when pausing or pivoting.
Why it Builds Confidence: This tiny habit is a giant confidence-builder. It acts as an anchor, preventing your fabric from shifting. When you pivot corners or navigate curves, you’ll do so with precision, eliminating the wobbles and misaligned seams that make you feel out of control.
3] Change Your Needle Religiously
The Rule: Change your sewing machine needle at the start of every major new project, or after every 8-10 hours of sewing.
Why it Builds Confidence: A fresh, sharp, correct needle (ballpoint for knits, sharp for wovens, denim for thick layers) eliminates a huge number of mysterious problems like skipped stitches, fabric pulls, and tension issues. Knowing you’ve eliminated this variable makes you feel in command of your machine.
4] Your Seam Ripper is a Teacher, Not a Punishment
The Rule: Reframe your thinking: using a seam ripper isn’t failure; it’s editing and learning.
Why it Builds Confidence: Every expert uses one. When you calmly take out a mistake, you’re actively problem-solving and committing to quality. This transforms a frustrating error into a empowering “aha!” moment where you understand why it went wrong, making you less likely to repeat the mistake.
5] Finish Your Seams Before You Start
The Rule: Decide how you will finish your raw edges (pinking, serging, zigzag, French seam) before you cut your fabric.
Why it Builds Confidence: This is forward-thinking and strategic. It moves you from just following instructions to truly building a garment. A clean interior finish feels incredibly accomplished and proves you are considering the entire lifecycle of your project.
Stop wasting time on confusing patterns. Start sewing with confidence – Click here now!
6] Make a “UFO” Pile (And It’s Okay)
The Rule: Give yourself permission to have Un-Finished Objects. If you’re stuck, frustrated, or just not feeling a project, put it in a box and walk away.
Why it Builds Confidence: The pressure to finish every single thing you start can kill joy and create anxiety. Knowing you can take a break prevents you from associating sewing with frustration. You can always come back to it later with fresh eyes and more skills. Confidence comes from enjoying the process, not just churning out products.
7] Sew a “Test Seam” on Your Actual Fabric
The Rule: Before sewing your final project, cut two small scraps of your fashion fabric and stitch a test seam. Check the tension, stitch length, and needle choice.
Why it Builds Confidence: This 30-second step prevents catastrophe. It confirms your machine settings are perfect for this specific fabric, giving you the green light to proceed with absolute certainty. It’s the ultimate act of a prepared and confident sewist.
8] Focus on the Guide, Not the Needle
The Rule: Don’t watch the hypnotic needle. Instead, look 2-3 inches ahead at the seam guide on your needle plate, keeping the fabric’s edge aligned with it.
Why it Builds Confidence: This simple shift in focus is revolutionary. Your seams will be straighter, your curves smoother, and you’ll feel more in control because you’re proactively guiding the fabric instead of reactively watching the chaos.
9] Clean Your Machine to Build Trust
The Rule: After every project (or every 8 hours of sewing), pop off the needle plate and brush out the lint from the bobbin area.
Why it Builds Confidence: This 2-minute habit builds a relationship of trust with your machine. You learn how it works, you prevent most jams and tension issues, and you stop fearing it. A well-maintained tool behaves predictably, and predictable tools build confident users.
10] Compare Your Work Only to Your Past Self
The Rule: Your only benchmark for progress is the project you made last month or last year.
Why it Builds Confidence: Comparing your simple skirt to a couture gown on Instagram is a recipe for imposter syndrome. But looking back at your first wobbly seam and seeing the straight, secure one you can sew today is tangible, undeniable proof of your growth. This self-recognition is the ultimate confidence booster.
Final Confidence-Building Truth: Confident sewists aren’t people who never make mistakes. They are people who aren’t afraid to make them because they trust in their ability to fix, learn, and carry on. Happy sewing.
Related Reading
17 Sewing Tools You’re Not Using (But Should Be)
The Ultimate Guide to Choosing the Right Needle and Thread
How to Save Money on Fabric and Supplies
Common Sewing Mistakes and How to Avoid Them
How to Cover Up Sewing Mistakes