
Starting your sewing journey can feel both exciting and intimidating. You’ve got your machine, your fabric, and a head full of ideas—but where do you begin? The key is to start with simple projects that build foundational skills without overwhelming you. The goal is to create something you can be proud of, not something that ends up in a pile of tangled thread and fabric scraps.
To get you started on the right foot, I’ve compiled a list of five of the easiest sewing patterns for absolute beginners. These projects are forgiving, don’t require complex techniques like zippers or buttonholes, and result in a useful, satisfying finished product.
Quick Navigation Menu
Related Reading
5 Easy Sewing Patterns for Beginners [ Step-By-Step Instructions]
1. The Simple Tote Bag
 A classic for a reason! A tote bag is essentially two large rectangles of fabric sewn together with straps. It’s a perfect project to master sewing straight lines and practice your seams.
What You’ll Learn:
How to Cut your fabric accurately.
Sewing straight seams.
Creating and attaching straps.
Finishing the top edge with a simple hem.
Step-by-Step Instructions:
1] Gather Your Materials: You’ll need about 1 yard of sturdy woven fabric (like canvas or a home décor cotton), a coordinating thread, and a sewing machine.
Optional but helpful: An iron, pins or clips, and a rotary cutter with a mat.
2] Cut Your Pieces: Cut two large rectangles for the body of the bag (e.g., 18″ x 20″). Cut two long, narrow strips for the straps (e.g., 4″ x 24″).
3] Create the Straps: Take one strap piece. Fold it in half lengthwise, right sides together, and press with an iron. Sew along the long edge with a 1/2″ seam allowance. Turn the strap right side out (a safety pin or loop turner works great for this!), then press it flat. Topstitch along both long edges for a professional look and added durability. Repeat for the second strap.
4] Sew the Bag Body: Place your two large rectangles for the bag body right sides together. Pin or clip the two side seams and the bottom seam. Sew along these three edges with a 1/2″ seam allowance, leaving the top open.
How to Effortlessly Make Over 150 Sewing Projects…Even If You’re A Complete Beginner!
Box the Corners (Optional but Recommended): To give your bag a flat bottom, you’ll “box” the corners. At one bottom corner, pull the front and back of the fabric apart so the side seam and the bottom seam are aligned. Press the corner into a triangle shape. Measure 2 inches down from the point and draw a straight line. Sew along this line. Trim the excess fabric. Repeat for the other bottom corner.
5] Attach the Straps: Turn the bag right side out. Fold the top raw edge down by 1/2″ and press. Then, fold it down another 1″ and press again to create a sturdy hem.
6] Pin the Straps: Place the ends of the straps on the front of the bag, about 4″ from each side seam, tucking the raw edges under the folded hem. Pin them securely.
7] Final Stitching: Sew all the way around the top opening of the bag, about 1/8″ from the folded edge, to secure the hem and the straps in place. For extra strength, sew another line of stitching 1/2″ below the first.
Check out Amazon’s full line of tote bag patterns Here.
2. The Simple Gathered Skirt
 A gathered skirt is a fantastic first garment because it requires no fitting and is a great introduction to gathering fabric and working with elastic.
What You’ll Learn:
How to Create a casing for elastic.
Gathering fabric.
Sewing a side seam and hemming.
Step-by-Step Instructions:
1] Gather Your Materials: You’ll need about 1.5 to 2 yards of lightweight woven fabric (like cotton lawn or quilting cotton), a piece of 1″ wide elastic long enough to fit snugly around your waist, and coordinating thread.
2] Cut Your Fabric: Cut one large rectangle. The width should be 1.5 to 2 times your hip measurement (for a nice, full gather). The length should be your desired skirt length plus about 2 inches for the waistband casing and 1 inch for the hem.
3] Sew the Side Seam: Fold your rectangle in half lengthwise, right sides together. Pin or clip the two short ends and sew them together with a 1/2″ seam allowance to form a tube.
4] Hem the Skirt: Turn the bottom raw edge of the skirt up by 1/2″ and press. Fold it up another 1/2″ and press again. Sew along the folded edge to create a neat hem.
Download Your Very Own Guide & Discover 150+ Beginner-Friendly Sewing Projects!
5] Create the Waistband Casing: At the top of the skirt, fold the raw edge down by 1/4″ and press. Then, fold it down by 1.25″ and press again. This creates a channel for your elastic.
6] Insert the Elastic: Sew along the bottom edge of the waistband casing, leaving a small 2-inch opening. Attach a safety pin to one end of your elastic and thread it through the casing. Be careful not to let the other end of the elastic slip inside!
7] Join the Elastic: Once the elastic is fully threaded, overlap the two ends by 1″ and sew them together with a zigzag stitch.
8] Close the Casing: Push the joined elastic into the casing and sew the opening closed. Give the waistband a few tugs to distribute the gathers evenly.
Check out Amazon’s full line of Gathered Skirt Patterns Here
3. The Envelope Pillow Cover
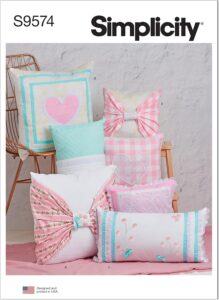 This is a great project for learning how to create an enclosure without a zipper, as well as practicing basic seam construction and finishing.
What You’ll Learn:
Measuring and cutting precise rectangles.
Creating a simple hem.
Constructing an “envelope” closure.
Step-by-Step Instructions:
1] Gather Your Materials: You’ll need a square pillow form, about 1 yard of woven fabric (quilting cotton works well), and coordinating thread.
2] Cut Your Pieces:
– Front Piece: Cut one square that is the same size as your pillow form (e.g., for a 16″ pillow, cut a 16″ x 16″ square).
– Back Pieces: Cut two rectangles. The height should be the same as your pillow form (e.g., 16″). The width should be the same as your pillow form’s width, plus about 4-5 inches for the overlap (e.g., for a 16″ pillow, cut two 16″ x 10.5″ rectangles).
3] Hem the Back Pieces: Take one of your back pieces. On one of the long edges, fold the fabric over by 1/2″ and press. Then, fold it over another 1/2″ and press again. Sew along this hem to finish the edge. Repeat this step for the other back piece.
Turn Thread and Fabric Into Masterpieces — Grab Your Free Guide Now!
4] Assemble the Cover: Lay your front piece right side up. Place one of the hemmed back pieces on top, right side down, aligning the raw edges on the left side. Then, place the second hemmed back piece on top, right side down, aligning the raw edges on the right side. The two hemmed edges will overlap in the middle.
5] Sew It All Together: Pin or clip all four sides. Sew all the way around the perimeter with a 1/2″ seam allowance.
6] Clip and Turn: Carefully clip the corners, being careful not to cut your stitching. Turn the pillow cover right side out through the envelope opening. Press with an iron to create crisp edges.
Check out Amazon’s full line of Envelope Pillow Cover Patterns Here
4. The Simple Infinity Scarf
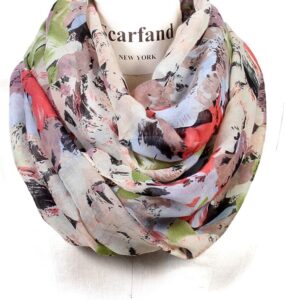 This project is a perfect way to practice sewing long, straight seams and using a serger if you have one. It’s a quick and satisfying project that makes a great gift.
What You’ll Learn:
Sewing with knit fabrics (a new skill!).
Joining pieces to create a continuous loop.
Finishing seams.
Step-by-Step Instructions:
1] Gather Your Materials: You’ll need about 1.5 yards of a soft knit fabric (like jersey or rayon knit), and coordinating thread.
2] Cut Your Fabric: Cut one long rectangle. The width can be anywhere from 12″ to 18″ depending on how wide you want the scarf. The length should be the entire width of your fabric (e.g., 60″ wide).
3] Sew the Long Seam: Fold the rectangle in half lengthwise, with the right sides together. Pin or clip along the long raw edge. Sew with a 1/2″ seam allowance to create a long tube.
4] Create the Loop: Turn the tube right side out. Now, it’s time to connect the two short ends. Take one end and tuck it inside the other. You will be able to match up the raw edges of the two ends. Pin them together.
5] Sew the Loop: Sew all the way around the circular raw edges to create a continuous loop. You’ll need to work slowly and move the fabric around the needle. Leave a small 2-inch opening.
6] Final Steps: Pull the scarf right side out through the opening. Hand stitch or machine stitch the opening closed. Give it a gentle press, and your scarf is ready to wear!
Check out Amazon’s line of Infinity Scarf Patterns Here
5. The Drawstring Bag
 Another excellent project for practicing straight lines and building a functional item. This is also a fantastic project for using up smaller pieces of fabric.
What You’ll Learn:
Sewing a casing for a drawstring.
Creating a neat opening for the drawstring.
Working with ribbon or cord.
Step-by-Step Instructions:
1] Gather Your Materials: You’ll need two rectangles of woven fabric (e.g., 12″ x 15″), about 1 yard of cord or ribbon for the drawstring, and coordinating thread.
2] Prepare the Fabric: Take one of the fabric rectangles. On one of the short sides, fold the fabric down by 1/4″ and press. Then, fold it down another 1″ and press again. This creates the casing for the drawstring. Repeat this for the other rectangle.
3] Sew the Casing: Sew along the bottom edge of the folded casing, leaving the side openings unstitched.
Ready to Sew? Learn How to Create Over 150 Projects Without Any Prior Skills!
4] Assemble the Bag: Place the two rectangles right sides together. Pin or clip around the two side seams and the bottom seam. Sew along these three seams with a 1/2″ seam allowance. When you get to the casing, be sure to backstitch at the top and bottom of the casing to reinforce the opening.
5] Finish the Bag: Turn the bag right side out. Use a safety pin to thread your cord or ribbon through one side of the casing, all the way around, and back out the same side. Tie the ends of the cord together in a knot. Now your bag is ready to use.
Check out Amazon’s line of Drawstring Bag Patterns Here
Related Reading
How to Read a Sewing Pattern: Symbols, Terms, and Tips
Top 10 Things Sewing Patterns Don’t Tell You
From Novice to Pro: Your Guide to Pattern & Measurement Skills
How to Build Confidence When Using Sewing Patterns